
No Bake Buckeye Bars

Indulgent no-bake bars with a crunchy graham cracker and peanut butter base topped in silky chocolate — an easy make-ahead dessert that disappears fast.
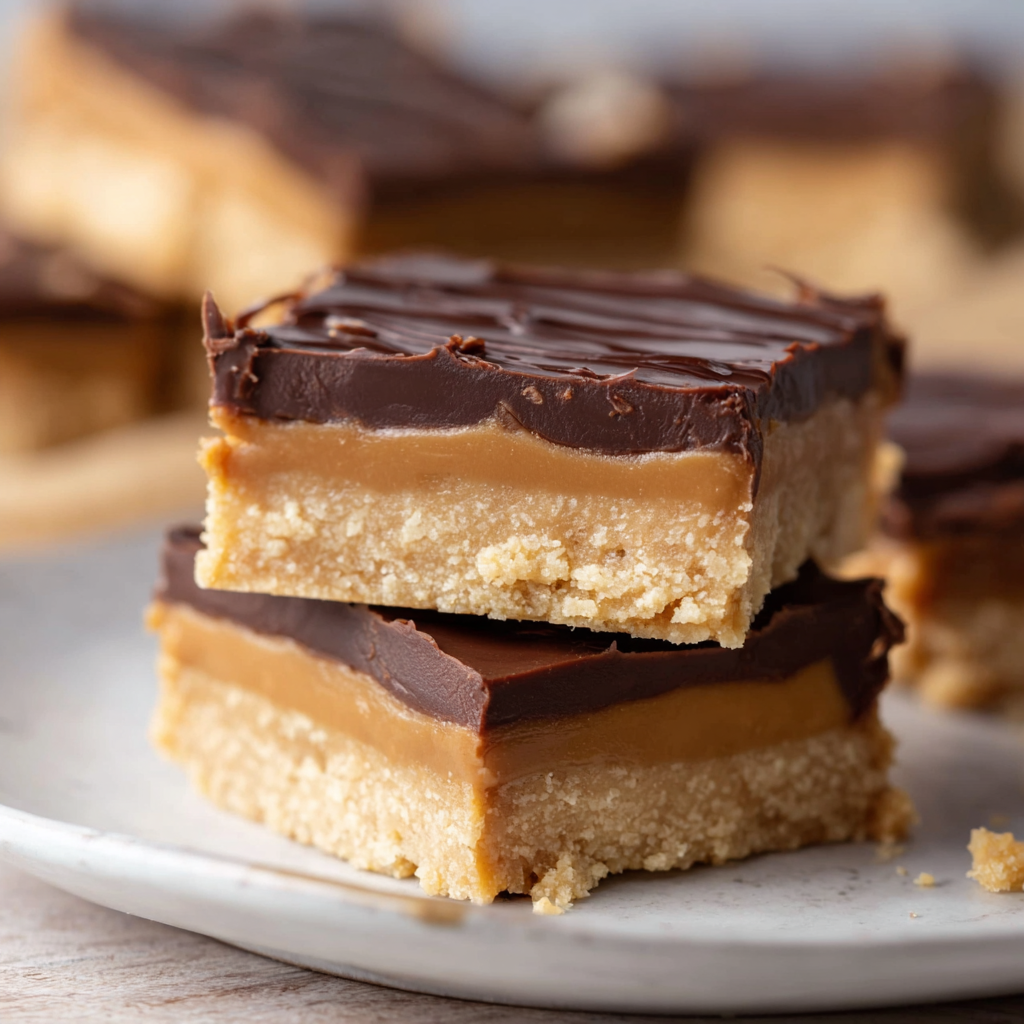
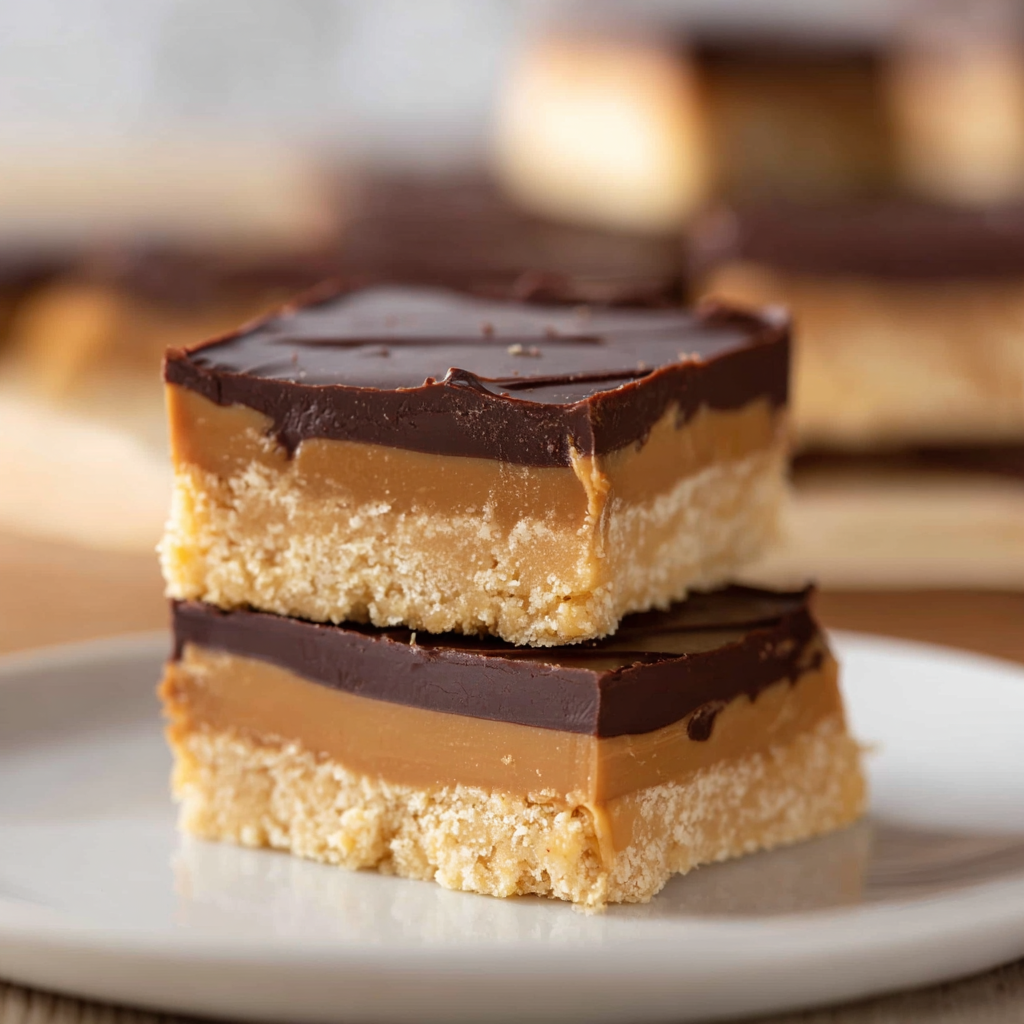
These No Bake Buckeye Bars have been my go-to make-ahead treat for potlucks, holiday cookie swaps, and last-minute dessert emergencies. I first made them the winter I wanted the flavor of classic buckeye candies without the fuss of rolling and dipping individual balls. The result is a dense, creamy slice that hits the same peanut-butter-and-chocolate high but in a bar you can cut, share, and stack. The contrast between the crunchy graham cracker base and the glossy chocolate top is exactly the texture contrast I crave in a dessert.
I vividly remember bringing a pan to a family brunch and watching them vanish before coffee was served; even the most particular aunt asked for the recipe. What makes these special is their simplicity — pantry staples and a microwave are all you need — and the way the peanut butter warms the chocolate topping into a silky glaze that sets firm in the fridge. Whether you want an easy bake-free treat for a crowd or a make-ahead gift plate, these bars deliver that comforting, nostalgic flavor of peanut butter cups in a more shareable form.
Why You'll Love This Recipe
- Ready in about 10 minutes of hands-on time with no oven required — ideal for busy weeks or hot weather when you don’t want to heat the kitchen.
- Uses simple pantry staples: graham crackers, powdered sugar, creamy peanut butter, butter, and chocolate chips — all easy to find and budget-friendly.
- Make-ahead friendly: chill overnight or freeze for 30 minutes for a quick set; keeps well in the fridge for several days and freezes beautifully for longer storage.
- Perfect for crowds — a 9x9 pan yields about 25 small squares, great for potlucks, school events, or cookie exchanges.
- One-bowl base mixing and a quick microwave melt for the topping make this approachable for cooks of all levels, even beginners.
- Customizable: swap the chocolate, add sea salt, or drizzle white chocolate for a finishing touch without changing the basic technique.
In my kitchen this recipe became a lifesaver during a busy holiday season. I taught my teenager to press the base into the pan on their own and they loved that the bars were ready to slice after recess — a small victory that made dessert duty feel collaborative. Friends have suggested adding chopped peanuts or a sprinkle of flaky sea salt at the end; both are small changes that amplify the flavor.
Ingredients
- Graham crackers: I use 14 full rectangular crackers (28 squares) to make 2 cups of crumbs — Nabisco Honey Maid yields consistent crumb size. The crackers provide a toasty, slightly sweet backbone that keeps the bar from becoming overly dense.
- Unsalted butter: 1 cup melted (2 sticks). Melted butter binds the crumbs and gives the base a tender, sliceable texture; use unsalted so you can control the salt level at the end.
- Powdered sugar: 2 cups confectioners’ sugar. This sweetens and firms the peanut butter mixture without any graininess and helps the bars hold their shape once chilled.
- Creamy peanut butter: 1 cup for the base plus 2 heaping tablespoons for the topping. I prefer a smooth, natural-style peanut butter for flavor, but store-brand creamy works fine in a pinch.
- Chocolate chips: 2 cups semisweet chocolate chips for the topping. Ghirardelli or a good-quality store brand melts smoothly; use chips labeled for melting when possible for shine.
Instructions
Prepare the pan: Line a 9x9-inch square pan with parchment paper, leaving an overhang on two sides for easy removal. Lightly grease the parchment with a neutral oil or a bit of melted butter so the bar releases cleanly. Make the crumbs: Pulse whole graham crackers in a food processor until you have fine crumbs. If you don’t have a processor, place crackers in a sealed plastic bag and crush with a rolling pin until uniform. Measure 2 cups of crumbs for the base. Mix the base: In a large bowl combine 2 cups graham cracker crumbs, 1 cup melted butter, 2 cups powdered sugar, and 1 cup creamy peanut butter. Use a sturdy spatula or your hands (wear food-safe gloves) to mix until well blended and the mixture sticks together when pressed. Press into pan: Transfer the mixture to the prepared pan and press firmly and evenly into the bottom using the base of a measuring cup or a flat-bottomed glass. The firmer you press, the cleaner the bars will slice once chilled. Chill briefly if needed to firm the base. Melt the topping: Place 2 cups chocolate chips and the remaining 2 heaping tablespoons of creamy peanut butter into a microwave-safe bowl. Microwave in 30-second intervals, stirring between each, until fully melted and smooth. Take care not to overheat; chocolate will seize if water gets in. Finish and chill: Pour the melted chocolate-peanut butter mixture over the pressed base and spread evenly with an offset spatula. Refrigerate for at least 1 hour until fully set; for faster results freeze 30 minutes. Use the parchment overhang to lift the slab from the pan and slice into roughly 25 squares with a sharp knife warmed under hot water, wiping dry between cuts.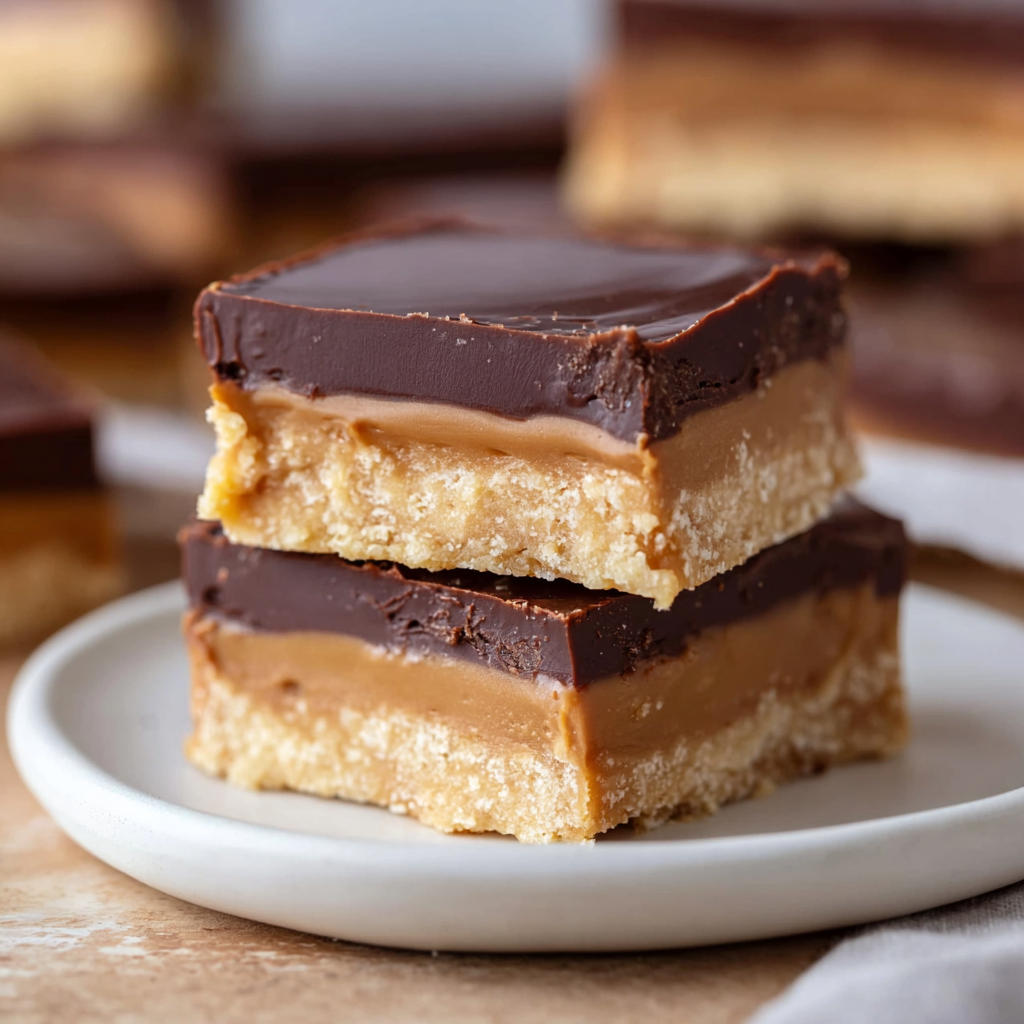
You Must Know
- High in calories and fat: each square contains about 263 kcal; enjoy in moderation as an occasional indulgence.
- Store chilled in an airtight container in the refrigerator for up to 5 days, or freeze for up to 3 months for longer storage.
- These set best when chilled fully; if left at room temperature they will soften and may lose clean edges when sliced.
- Allergens: contains peanuts, dairy, and gluten from graham crackers — see substitutions if you need to avoid any of these.
My favorite part is the way the chocolate becomes glossy and slightly firm, giving way to a dense, chewy peanut-butter layer beneath. I often make a double batch during the holidays and portion into gift boxes; the bars stack neatly and taste even better a day after chilling when flavors have had time to meld.
Storage Tips
Store squares in a single layer in an airtight container or plate lined with parchment to prevent sticking. For longer storage stack with parchment or wax paper between layers. Keep refrigerated; these bars will remain fresh for about 4 to 5 days. For freezing, wrap the cooled slab tightly in plastic wrap and then foil or place in a freezer-safe container. Thaw in the refrigerator overnight before slicing for neat edges. If you’re in a hurry, freeze for 30 minutes to an hour to set the topping quickly, then slice and return to the fridge.
Ingredient Substitutions
If you need gluten-free bars, swap graham crackers for a certified gluten-free graham or use gluten-free digestive biscuits; the texture will be similar. To make dairy-free, use a dairy-free butter alternative and choose dairy-free chocolate chips — expect a slightly different mouthfeel but similar flavor. For a crunchy base, fold 1/2 cup chopped roasted peanuts into the base. If you prefer a less sweet bar, reduce the powdered sugar by 1/4 cup and increase salt with a pinch of flaky sea salt on the chocolate top to balance flavors.
Serving Suggestions
Serve chilled squares on a dessert platter garnished with a light sprinkle of flaky sea salt or a drizzle of melted white chocolate for contrast. These pair well with black coffee or a milk-based beverage. For a festive twist, top with crushed peppermint during the holidays or add toasted coconut flakes and chopped peanuts for a tropical take. Cut into smaller bite-sized pieces for a party tray or into larger squares for an after-dinner dessert.
Cultural Background
These bars are inspired by the beloved American buckeye candy — named for the nut of Ohio’s state tree — which traditionally features a peanut-butter center dipped in chocolate. No-bake bars are an evolution of that idea, translating the same flavors into a slab format that’s easier to share. Similar peanut-butter-and-chocolate combinations are found across North American home baking traditions, especially in community potlucks and holiday cookie exchanges where quick, portable sweets are prized.
Seasonal Adaptations
In summer, keep the pan chilled and serve directly from the fridge so the chocolate stays firm. For fall and winter, add a pinch of ground cinnamon and a touch of molasses to the base for warm autumnal notes. At holiday time, press mini candy canes into the chocolate layer after spreading, or top with chopped roasted pecans for a rustic finish. These small adjustments let you adapt the bars to different seasonal flavors without changing the technique.
Meal Prep Tips
Make the base up to 24 hours ahead and leave covered in the pan. Top with melted chocolate and chill when you’re ready to serve. For maximum efficiency, double the recipe and freeze one slab for quick entertaining later. Use a ruler to mark even cuts on the underside of the parchment before slicing; this creates uniform squares and speeds up portioning for events.
These No Bake Buckeye Bars are a small, reliable indulgence that reward minimal effort with maximum satisfaction. They travel well, make great gifts, and are a great example of how simple pantry ingredients can yield something truly special. Share them, tweak them, and make them your own — they’re a recipe I return to again and again.
Pro Tips
Press the base firmly into the pan with the bottom of a measuring cup to ensure clean slices.
Warm the knife under hot water and wipe dry between cuts for neater squares.
Microwave chocolate in 30-second intervals and stir to avoid overheating and seizing.
Chill the slab at least 1 hour for best texture; freeze 30 minutes if short on time.
Line the pan with parchment with an overhang for easy removal and cleaner edges.
This nourishing no bake buckeye bars recipe is sure to be a staple in your kitchen. Enjoy every moist, high protein slice — it is perfect for breakfast or as a wholesome snack any time.
FAQs about Recipes
Can I freeze these bars?
Yes — wrap the cooled slab tightly and freeze for up to 3 months. Thaw in the refrigerator overnight before slicing.
How do I make graham cracker crumbs without a food processor?
If you don’t have a food processor, crush graham crackers in a sealed bag with a rolling pin until fine.
How can I make these bars dairy-free or gluten-free?
Use dairy-free butter and dairy-free chocolate chips; use gluten-free graham crackers if needed.
Tags
No Bake Buckeye Bars
This No Bake Buckeye Bars recipe makes perfectly juicy, tender, and flavorful steak every time! Serve with potatoes and a side salad for an unforgettable dinner in under 30 minutes.
Ingredients
Topping
Instructions
Prepare the pan
Line a 9x9-inch pan with parchment paper, leaving an overhang for easy removal. Lightly grease the parchment so the bars release cleanly.
Make the crumbs
Pulse whole graham crackers in a food processor until fine crumbs form. Alternatively, crush in a sealed bag with a rolling pin. Measure 2 cups of crumbs.
Mix the base
Combine 2 cups graham cracker crumbs, 1 cup melted butter, 2 cups powdered sugar, and 1 cup creamy peanut butter in a large bowl. Mix until well combined and the mixture clumps when pressed.
Press into pan
Press the mixture firmly and evenly into the prepared pan using the bottom of a measuring cup to compact the base for clean cutting later.
Melt the topping
Place 2 cups chocolate chips and 2 heaping tablespoons peanut butter in a microwave-safe bowl. Microwave in 30-second intervals, stirring between, until completely melted and smooth.
Assemble and chill
Spread the melted chocolate mixture evenly over the pressed base. Refrigerate for at least 1 hour until the topping is firm. For quicker setting, freeze 30 minutes.
Slice and serve
Lift the set slab from the pan using the parchment overhang. Use a sharp knife warmed under hot water and wiped dry between cuts to slice into approximately 25 squares. Serve chilled or store refrigerated.
Last Step: Please leave a rating and comment letting us know how you liked this recipe! This helps our business to thrive and continue providing free, high-quality recipes for you.
Nutrition
Did You Make This?
Leave a comment & rating below or tag
@kitchenfunwithmy3sons on social media!
Categories:
You might also like...
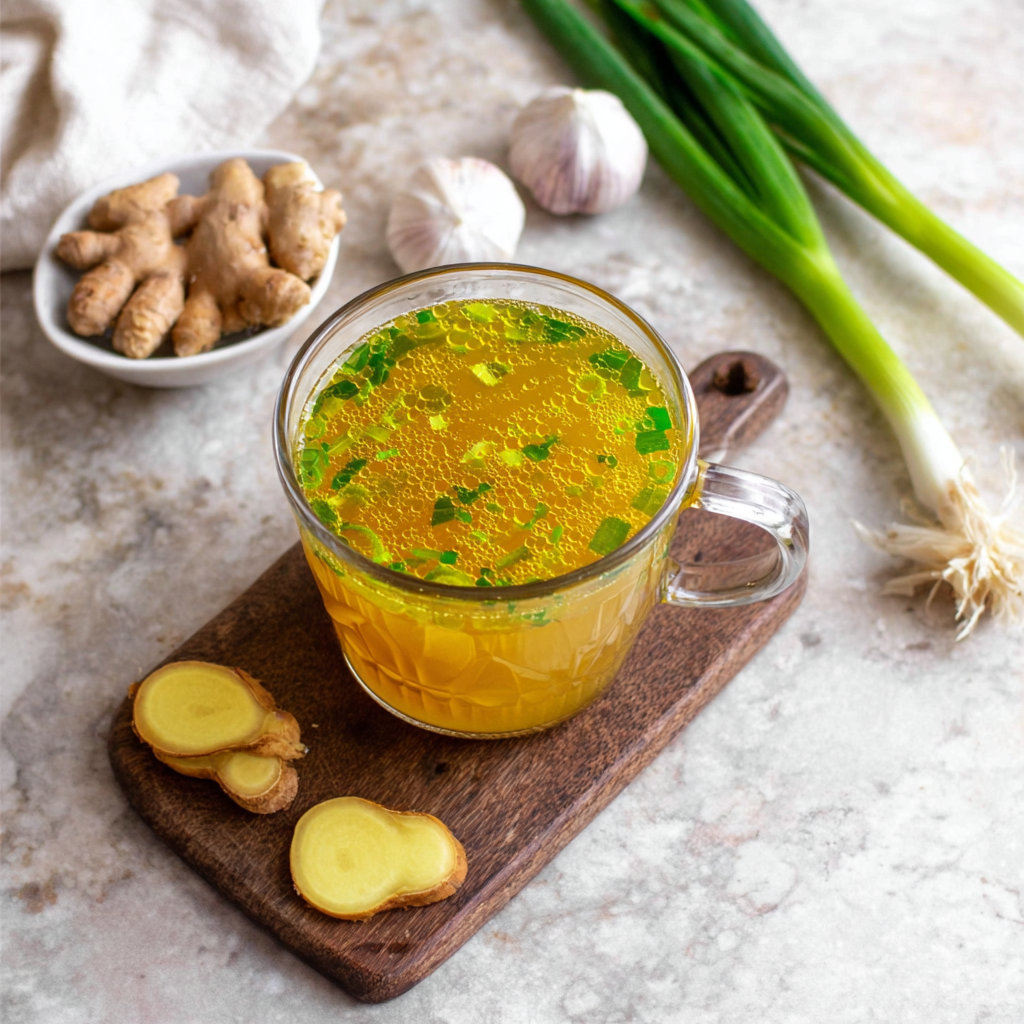
10 Minute Immune Boosting Broth
A quick, restorative broth packed with garlic, ginger, miso and turmeric—ready in 10 minutes to soothe, hydrate and support immunity.
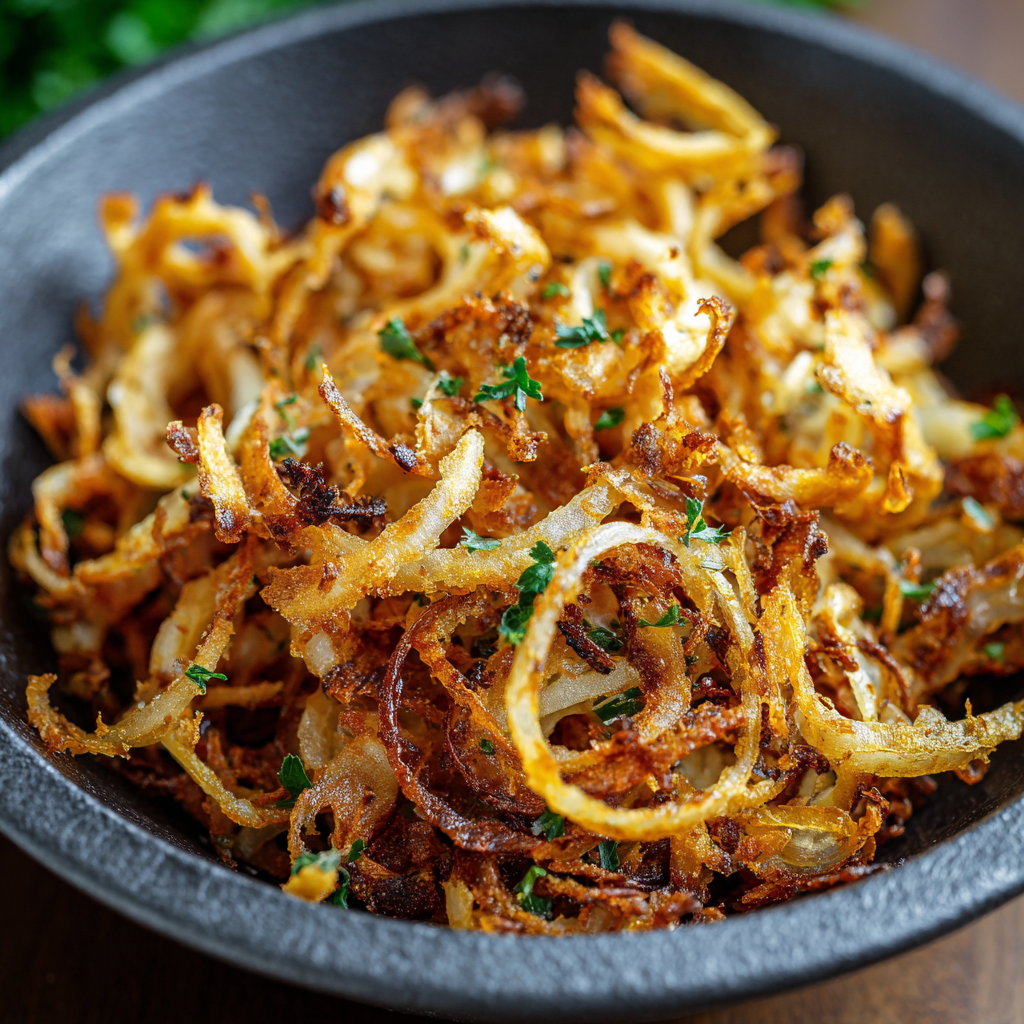
Air Fried Crispy Onion
Make irresistibly crispy caramelized onions in the air fryer using a whisper of oil—no deep frying required. A perfect crunchy condiment to top salads, biryanis, and sandwiches.
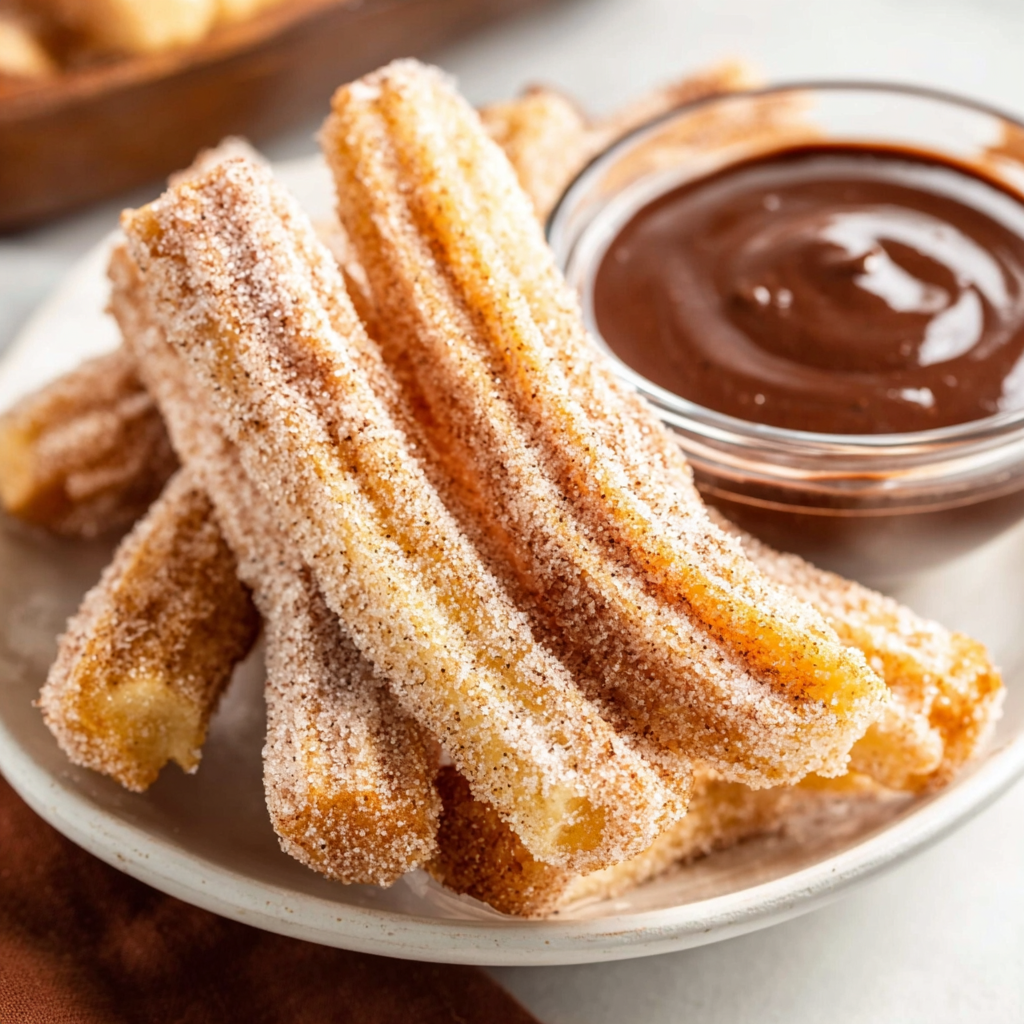
Air Fryer Churros
Golden, crisp-on-the-outside, pillowy-on-the-inside churros made in the air fryer. A lighter way to enjoy a Mexican classic, perfect for parties and weeknight treats.
Did You Make This?
Leave a comment & rating below or tag @kitchenfunwithmysons on social media!
Rate This Recipe
Share This Recipe
Enjoyed this recipe? Share it with friends and family, and don't forget to leave a review!
Comments (1)
This recipe looks amazing! Can't wait to try it.
Comments are stored locally in your browser. Server comments are displayed alongside your local comments.
Hi, I'm Melissa!
What's Popular
Get My 30-Minute Meals email series!
Quick and easy dinner ideas delivered to your inbox.