
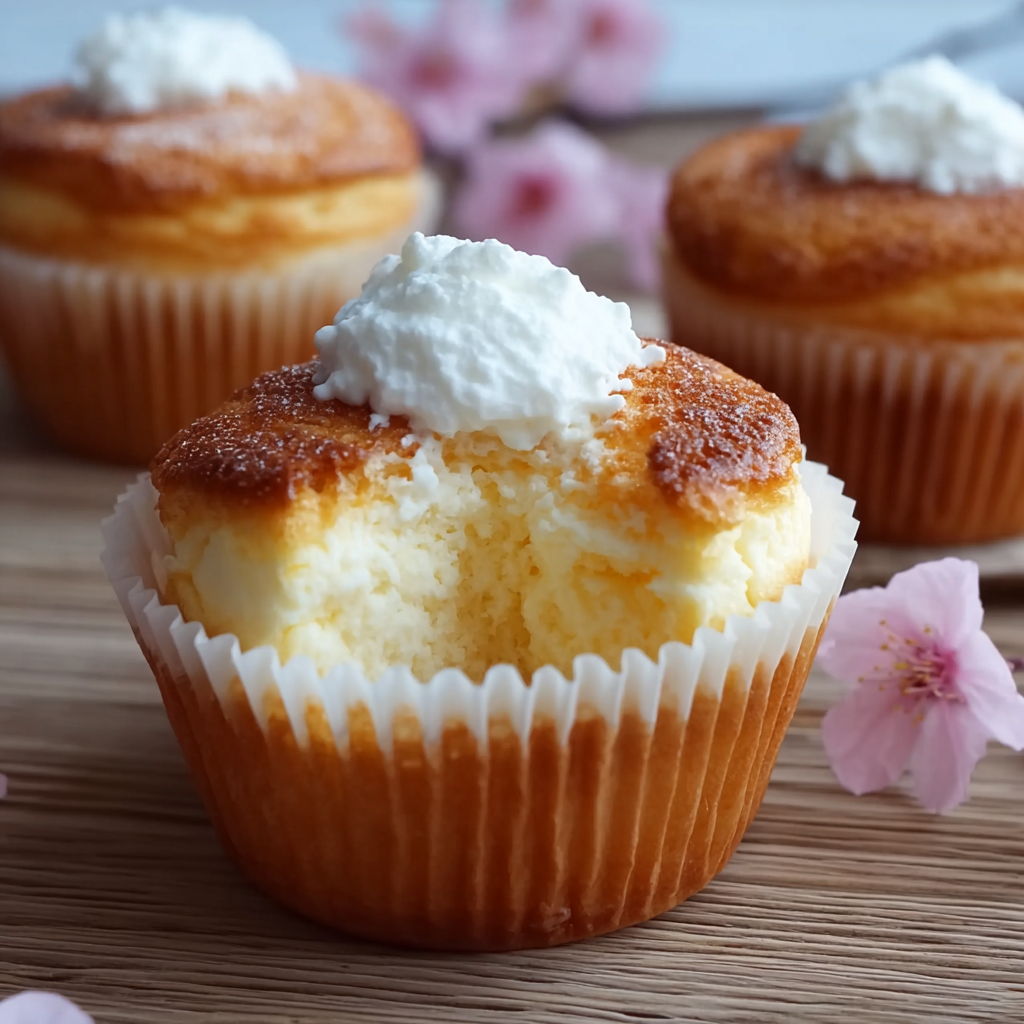
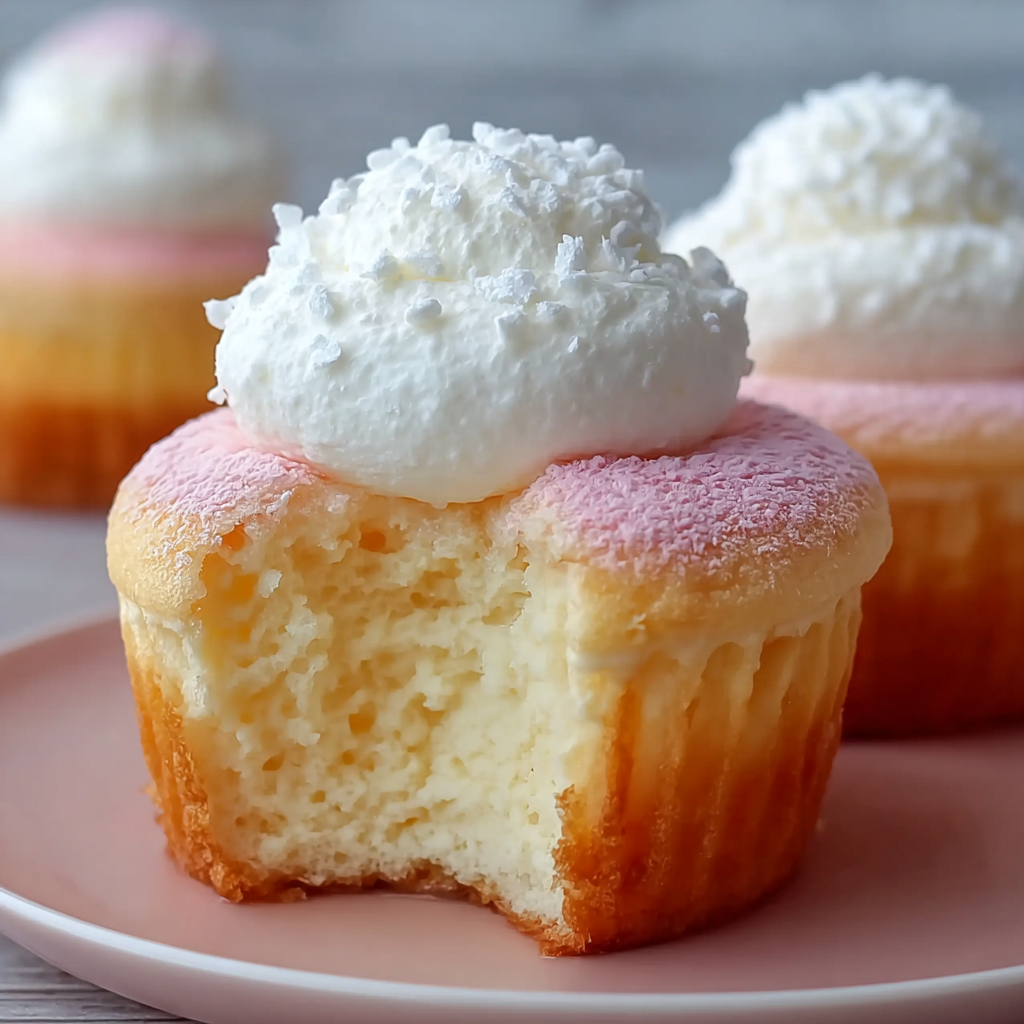
Japanese Cotton Cheesecake Cupcakes

Delicate, cloud-like cheesecakes baked in cupcake form—light as air with a gentle cream cheese tang. Perfect for tea time, gifts, or elegant dessert plates.
When I first tried Japanese Cotton Cheesecake Cupcakes, it was on a rainy spring afternoon during a visit to a friend’s Tokyo home. As we sat by the window sipping green tea, she brought out these delicate little cheesecakes—soft as clouds, gently sweet, with a slight tang of cream cheese that melted on the tongue. I was instantly enchanted. The contrast between the airy lift and the subtle richness of the cream cheese stayed with me, and I started experimenting in my own kitchen to capture that ethereal texture in a single-serve format.
Japanese Cotton Cheesecake, often called soufflé cheesecake, differs from the dense Western style by relying on whipped egg whites folded into a cream-cheese base. The result is a dessert that manages to feel both light and indulgent, perfect for special moments that call for something elegant but not overly heavy. The cupcake-sized version makes serving simple, and these small cakes are charming when plated for a tea party or tucked into a gift box for friends.
Why You'll Love This Recipe
- Cloud-like texture achieved with a simple meringue technique—no stabilizers, just careful folding for lift and silkiness.
- Quick to make: active prep is around 20 minutes and bake time under 30 minutes, so you can serve fresh the same day.
- Uses pantry staples—cream cheese, eggs, a little flour and cornstarch—so it’s easy to pull together without specialty ingredients.
- Small servings keep portions elegant and light—perfect for showers, afternoon tea, or gifting in boxes.
- Make-ahead friendly: they hold their texture well after chilling and can be frozen for convenience.
My family fell in love with these the first time I served them at a small Sunday gathering; even my most cake-skeptical cousin asked for seconds. I discovered that gentle whisking and patience while folding make all the difference—rushing the meringue in results in a denser crumb. Over time I learned little tricks, like warming the cream cheese mixture just enough to loosen it and letting the cupcakes cool slowly in the oven to avoid sudden collapse.
Ingredients
- Cream cheese (4 oz, softened): Use full-fat block-style cream cheese such as Philadelphia for a clean, tangy flavor and stable structure. Avoid spreadable tubs—they have added water and won’t set properly.
- Unsalted butter (2 tablespoons): Adds silkiness and helps the batter emulsify; allow to come to room temperature so it blends smoothly with the warmed cream cheese.
- Whole milk (1/4 cup): Provides moisture and a touch of richness—replace with half-and-half for a slightly creamier bite.
- Eggs (3 large, separated): Fresh eggs give the best volume. Cold egg whites whip more easily, while room-temperature yolks blend smoothly into the base.
- Vanilla extract (1/2 teaspoon) and lemon juice (1/2 teaspoon): Vanilla rounds the flavor, while a little lemon brightens the cream cheese without making the cake overtly citrusy.
- Cake flour (1/4 cup) and cornstarch (1 tablespoon): Cake flour keeps the texture tender; if you only have all-purpose, sift twice and use the same measure for acceptable results.
- Granulated sugar (1/4 cup): Gives structure to the meringue and a delicate sweetness—adjust slightly if you prefer more or less sweetness.
- Powdered sugar and fresh berries (optional): For finishing—dust lightly with powdered sugar or top with berries for color and a bright contrast.
Instructions
Step 1: Prepare your oven and water bath Preheat your oven to 320°F (160°C). Line a 12-cup muffin tin with paper liners and set it inside a deep roasting pan. Bring a kettle of water to a simmer—you’ll pour hot water into the roasting pan later to create a gentle, humid heat that prevents cracking and promotes even rise. Step 2: Melt the base In a small saucepan over low heat, combine the softened cream cheese, butter, and whole milk. Stir constantly until the mixture is smooth and silky; do not overheat—aim for warm to the touch, about 100–110°F. Remove from heat and let the mixture cool slightly so it won’t cook the egg yolks in the next step. Step 3: Build the flavor foundation In a medium bowl whisk the egg yolks with vanilla and lemon juice until uniform. Slowly pour in the warm cream cheese mixture while whisking constantly. This gradual incorporation prevents lumps and helps the yolks emulsify with the dairy for a satiny batter. Step 4: Sift in dry ingredients Sift the cake flour and cornstarch over the yolk mixture. Whisk gently until smooth and free of lumps—overmixing will deflate the batter, so keep it light. Step 5: Whip the egg whites In a clean, dry bowl, beat the egg whites on medium speed until foamy. Gradually add the granulated sugar and continue beating until soft peaks form—peaks should hold lightly and droop at the tips. This meringue is the lift engine, so don’t underbeat. Step 6: Fold with patience Fold one-third of the meringue into the yolk mixture to loosen it, then gently fold in the remaining meringue in two additions. Use a wide spatula and a lifting, turning motion to preserve as much air as possible—rushing will knock out the volume that creates the signature cotton-like crumb. Step 7: Pour and bake Spoon the batter into liners, filling each about three-quarters full. Carefully pour the hot water into the roasting pan until it reaches halfway up the sides of the muffin tin. Bake for 20–25 minutes, or until the tops are pale golden and a gentle jiggle remains in the center. Step 8: Cool gracefully Turn off the oven and crack the door open. Let the cupcakes rest inside for 5 minutes to settle slowly, then remove the pan and cool the cupcakes in the tin for another 10 minutes before transferring to a wire rack. Cool completely if chilling. Step 9: Finish and serve Dust with powdered sugar or top with fresh berries. Serve warm for the most pillowy texture, or refrigerate for at least 2 hours for a creamier, denser mouthfeel.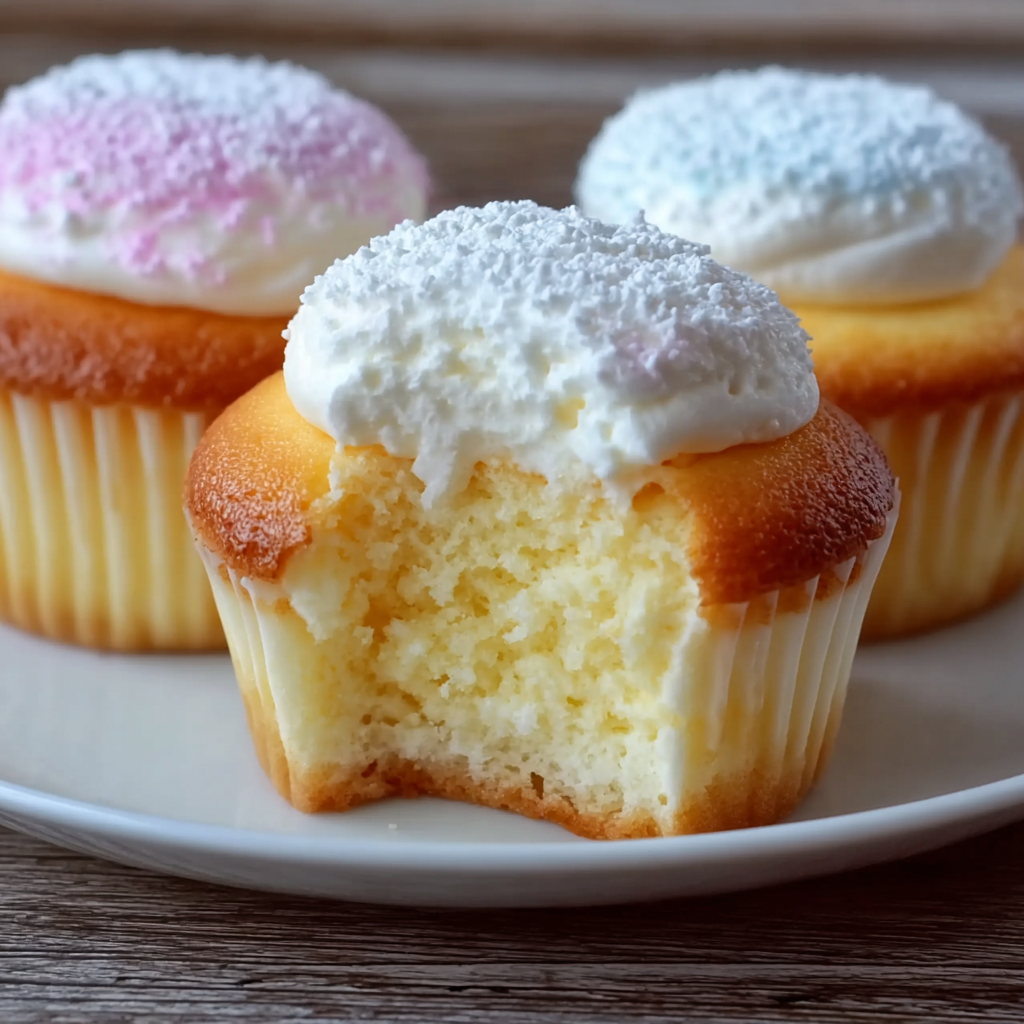
You Must Know
- These are light on calories compared to rich cheesecakes—each cupcake is approximately 100 calories, but exact numbers depend on brands and serving size.
- Store refrigerated in an airtight container for up to 3 days; they also freeze well for up to 1 month—thaw overnight in the fridge.
- The water bath keeps oven humidity high, preventing tops from cracking and encouraging even rise.
- Best enjoyed warm for the softest texture or chilled for a creamier bite that slices cleanly.
What I love most is how these cakes feel both delicate and comforting—perfect for a quiet afternoon with tea or as an elegant ending to a dinner party. Once, at a friend’s baby shower, guests kept asking for the recipe after tasting these. It’s a dessert that makes people smile without overwhelming the palate.
Storage Tips
Store cooled cupcakes in an airtight container in the refrigerator for up to 3 days. Layer them gently with parchment paper to avoid smudging the tops. For longer storage, freeze individually on a tray until firm, then transfer to a freezer-safe bag for up to 1 month. Thaw in the refrigerator overnight and bring to room temperature or warm in a low oven (250°F) for a few minutes before serving. Avoid thawing at room temperature for long periods to maintain texture and food safety.
Ingredient Substitutions
If you prefer a lighter dairy profile, substitute half the cream cheese with full-fat ricotta for a subtly grainier texture and milder tang. For a gluten-free option, replace cake flour with a 1-to-1 gluten-free baking blend and ensure cornstarch is certified gluten-free. Use non-dairy milk and vegan cream cheese for a dairy-free version—note the texture will be slightly different and may be less stable. Swapping lemon juice for a teaspoon of yuzu or orange zest adds a fragrant citrus lift.
Serving Suggestions
Serve these with a small spoonful of lightly sweetened whipped cream and a scatter of fresh berries for color and acidity. For tea service, place one cupcake on a small dessert plate with a dusting of powdered sugar and a mint sprig. They also pair beautifully with green tea, jasmine tea, or a bright sparkling wine. For a brunch buffet, plate on tiered stands to showcase their dainty size.
Cultural Background
Soufflé-style cheesecakes are a beloved fixture in Japanese patisseries—delicate, airy, and often subtly sweet. They evolved as a lighter alternative to dense European cheesecakes and reflect Japanese preferences for texture and balance. These cakes often appear in cafes and are a popular homemade treat for holidays and gatherings. The cupcake adaptation simplifies portioning and introduces a playful, modern twist while preserving the original technique of folding meringue into a cream-cheese base.
Seasonal Adaptations
In spring, incorporate fresh strawberries or a thin strawberry compote on top. Summer calls for a lemon-raspberry drizzle to brighten the palate. In autumn, fold in a teaspoon of warm spices like cinnamon and a touch of maple syrup for a cozy variation. For winter holidays, top with a dollop of chestnut cream or a sprinkle of toasted almonds. Adjust fruit and garnish to balance sweetness and acidity with the soft cream-cheese base.
Meal Prep Tips
For entertaining, bake the cupcakes a day ahead and chill overnight—the flavor develops and they’re easier to plate. Transport chilled in a container with a fitted lid and pack chilled gel packs for longer trips. If you need to free up morning time, the batter can be prepared up to the point of folding and refrigerated for a few hours; whip fresh meringue just before folding to preserve maximum lift. Use a small cookie scoop for uniform portions and even baking.
These little cakes have become a favorite in my house because they offer an elegant dessert with surprisingly little fuss. They invite careful technique but repay you with a texture that delights. I hope this version brings the same cozy, refined pleasure to your table that it has to mine.
Pro Tips
Use room-temperature yolks and cold whites for better meringue volume.
Warm the cream cheese mixture only until smooth (about 100–110°F) to avoid cooking the yolks.
Fold gently with a wide spatula, turning and lifting to preserve air bubbles.
Bake in a water bath to maintain humidity and prevent cracks.
Cool slowly in the oven with the door cracked to reduce collapse.
This nourishing japanese cotton cheesecake cupcakes recipe is sure to be a staple in your kitchen. Enjoy every moist, high protein slice — it is perfect for breakfast or as a wholesome snack any time.
Tags
Japanese Cotton Cheesecake Cupcakes
This Japanese Cotton Cheesecake Cupcakes recipe makes perfectly juicy, tender, and flavorful steak every time! Serve with potatoes and a side salad for an unforgettable dinner in under 30 minutes.
Ingredients
Base
Dry Ingredients
Finishing
Instructions
Prepare oven and water bath
Preheat oven to 320°F (160°C). Line a 12-cup muffin tin with paper liners and set inside a deep roasting pan. Bring water to a simmer to add to the roasting pan later for a water bath that will keep baking humidity high.
Melt the base ingredients
In a small saucepan over low heat, melt cream cheese, butter, and milk while stirring constantly until smooth and warm (about 100–110°F). Remove from heat and let cool slightly before mixing with yolks.
Mix yolks and flavorings
Whisk egg yolks with vanilla extract and lemon juice. Slowly incorporate the warm cream cheese mixture into the yolks until uniform to form a silky batter.
Sift dry ingredients
Sift cake flour and cornstarch over the batter and whisk gently until smooth and lump-free, taking care not to overmix.
Whip egg whites
Beat egg whites in a clean, dry bowl until foamy. Gradually add granulated sugar and continue beating until soft peaks form—peaks should droop slightly at the tips.
Fold meringue into batter
Fold one-third of the meringue into the yolk mixture to loosen it, then fold in the remaining meringue in two batches using a lifting motion to retain air.
Fill liners and bake in water bath
Spoon batter into liners about three-quarters full. Pour hot water into the roasting pan until it reaches halfway up the muffin tin. Bake 20–25 minutes until tops are pale golden and centers jiggle slightly.
Cool gently and finish
Turn off oven and crack door open; let cupcakes rest 5 minutes inside, then cool in pan 10 minutes before transferring to a rack. Dust with powdered sugar or top with berries. Serve warm or chilled.
Last Step: Please leave a rating and comment letting us know how you liked this recipe! This helps our business to thrive and continue providing free, high-quality recipes for you.
Nutrition
Did You Make This?
Leave a comment & rating below or tag
@kitchenfunwithmy3sons on social media!
Categories:
You might also like...
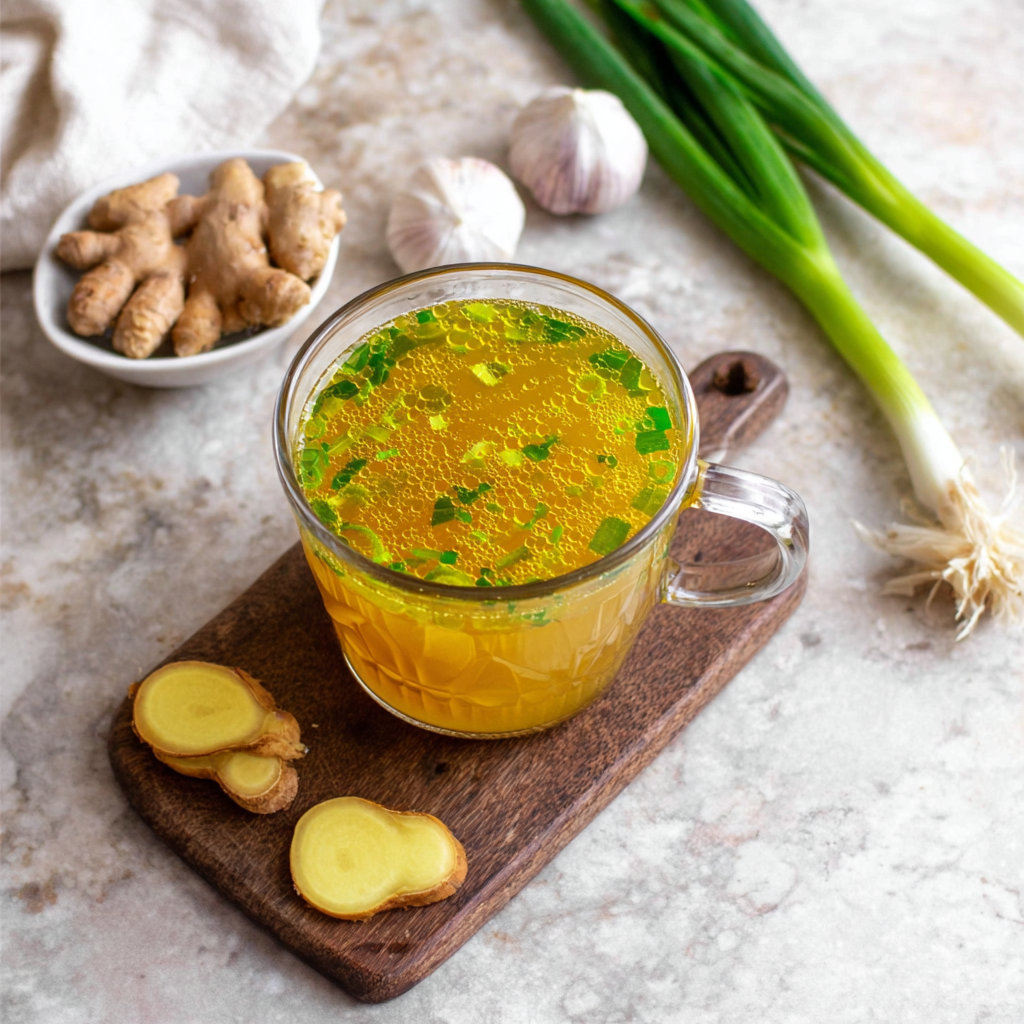
10 Minute Immune Boosting Broth
A quick, restorative broth packed with garlic, ginger, miso and turmeric—ready in 10 minutes to soothe, hydrate and support immunity.
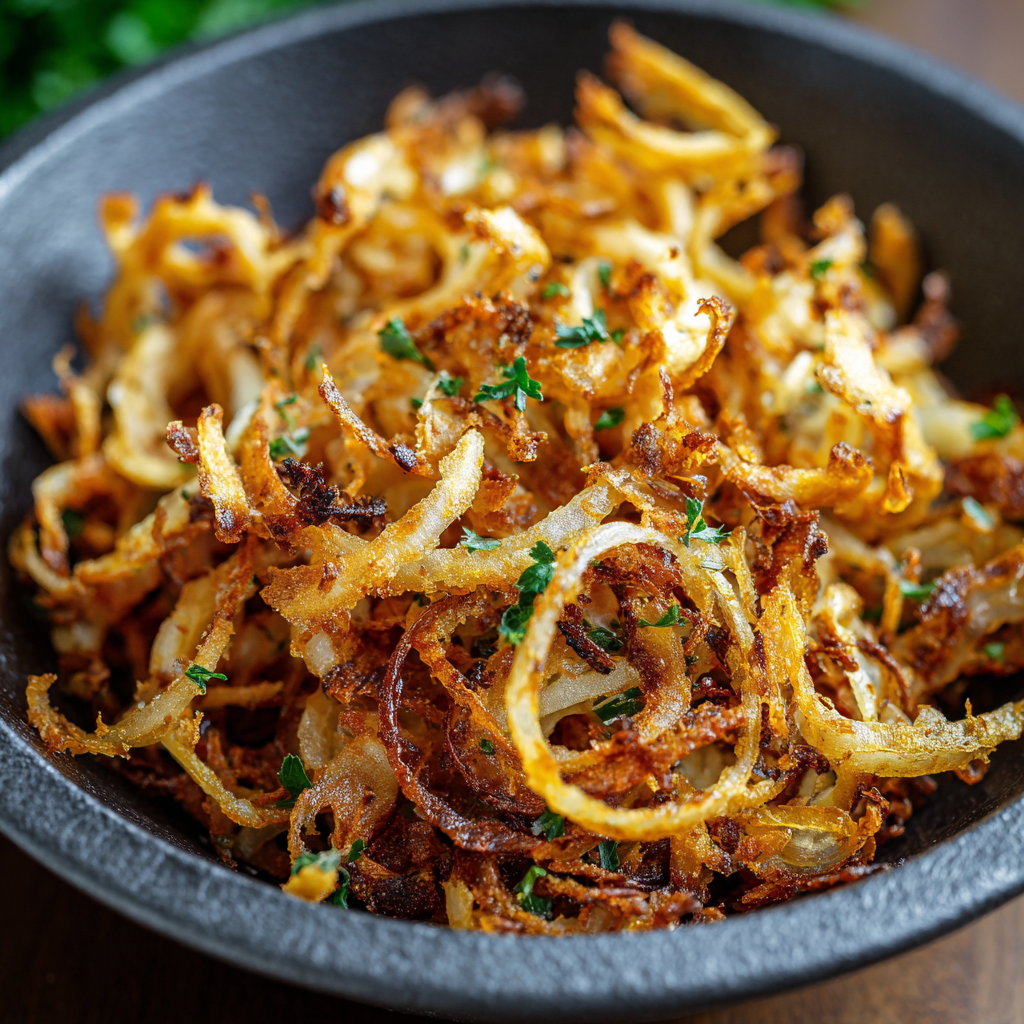
Air Fried Crispy Onion
Make irresistibly crispy caramelized onions in the air fryer using a whisper of oil—no deep frying required. A perfect crunchy condiment to top salads, biryanis, and sandwiches.
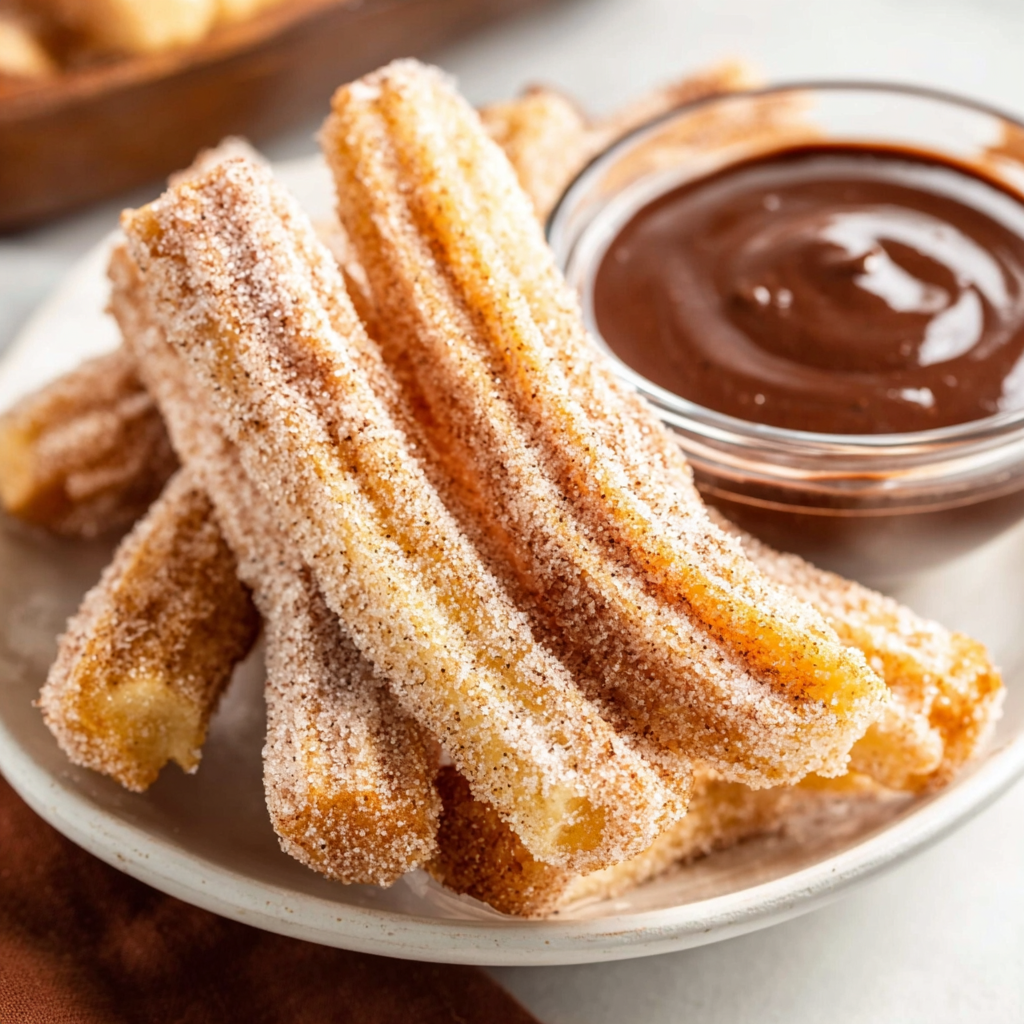
Air Fryer Churros
Golden, crisp-on-the-outside, pillowy-on-the-inside churros made in the air fryer. A lighter way to enjoy a Mexican classic, perfect for parties and weeknight treats.
Did You Make This?
Leave a comment & rating below or tag @kitchenfunwithmysons on social media!
Rate This Recipe
Share This Recipe
Enjoyed this recipe? Share it with friends and family, and don't forget to leave a review!
Comments (1)
This recipe looks amazing! Can't wait to try it.
Comments are stored locally in your browser. Server comments are displayed alongside your local comments.
Hi, I'm Melissa!
What's Popular
Get My 30-Minute Meals email series!
Quick and easy dinner ideas delivered to your inbox.